- What is a Contact List?
- What is an Organisation List?
- Creating a List
- Managing Your Contact Lists
- Using Your Contact Lists
There are two types of Lists you can create in your Contacts module: a list of Contacts, or a list of Organisations.
What is a Contact List?
A Contact List is pretty much what it says on the tin. It's a List of your contacts that you've grouped together based on similarities they have. You can organise your contacts into lists using many different types of criteria. They can be used for the following:
- Sending email marketing to.
- Exporting for creating postal mail merges.
- Exporting for further analysis.
- Keeping track of how well your marketing is going.
Some examples of Contact Lists could be:
- All contacts with a Point Score of over 100.
- All contacts at organisations that have received more than 5 quotes but have not yet purchased from you.
- Contacts who have filled out certain lead generation forms and visited specific pages on your website.
You can quickly see the power of Contact Lists – they enable you to group your contacts into similar bands which you can then send highly targeted and segmented marketing to. Want to reignite the interest of contacts who have not bought from you in 6 months? Want to offer a discount to your very best customers? All are easily achievable with Contact Lists.
What is an Organisation List?
An Organisation List, again, is a list of Organisations you have grouped together to identify as having similarities, which you are able to export.
Some examples of Organisation Lists could be:
- All Organisations in a certain region.
- All Organisations that have purchased from you more than 5 times.
- All Organisations that have not yet ordered a certain product or service from you.
Creating a List
Getting Started
Go to your Contacts module then head to either Organisations or Contacts, depending on which you'd like to create a list of.
N.B. you can only send marketing to a list of Contacts.
On the Contacts or Organisations page, you'll see an option for Filters:

If you click this, a side panel will appear where you can start to build up your Contact and Organisation filters. Choose the filter you would like to add, and then click Save:
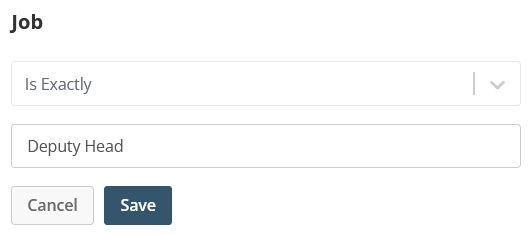
'AND' Statements
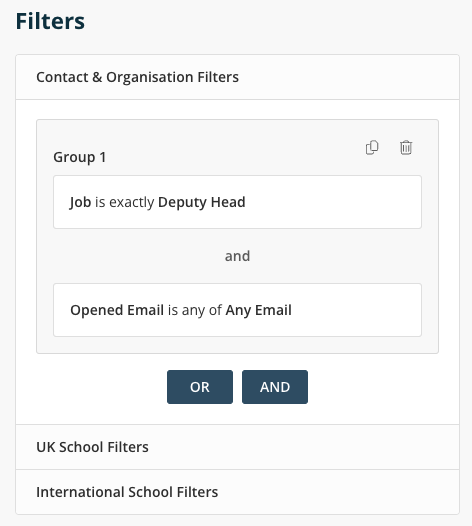
When setting your filters, you can add a new one by clicking 'AND'. This adds a new statement for you in the List Builder and tells Campus that you want to build a list of contacts based on your first statement AND another statement. For example, if you wanted a list of contacts whose job role is Deputy Head AND who have also opened one of your previous marketing emails, you would use the AND option to add each filter:
'OR' Statements
The other button of note is the 'OR' statement.
This adds a whole new set of statements for you in the List Builder and tells Campus that you want to build a list of Contacts based on your first set of statements OR another set of statements. For example, if you wanted a list of Contacts who were Deputy Heads AND had opened one of your marketing emails OR Contacts who were Deputy Heads AND had filled out your Campus form then your statements would look like this.
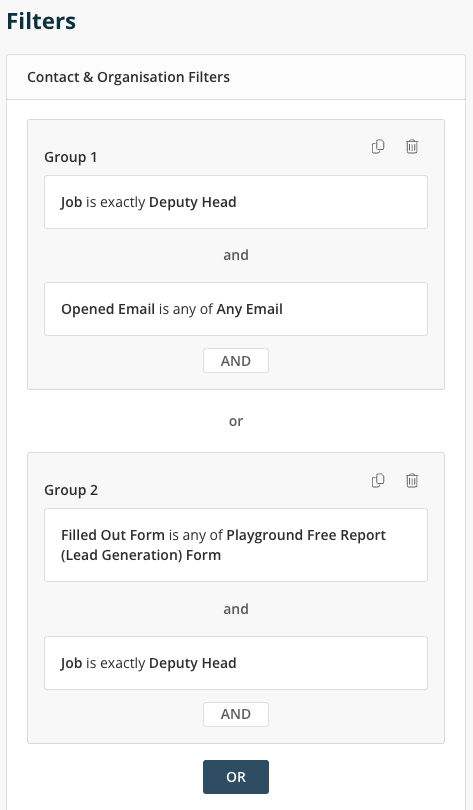
As you can imagine, you can get ultra-selective with your Contact List Builder statements and the possibilities are endless. By using it you'll be able to market your products and services in the smartest way, at the smartest time, to the right demographic of contacts.
Once you're happy with your filters, you can close the side panel and the Contact or Organisation table will show only those that fall into your filters. You can then click the option to Save List. This will open up a box where you can set the list name, description and also Share it, Pin it or Favourite it: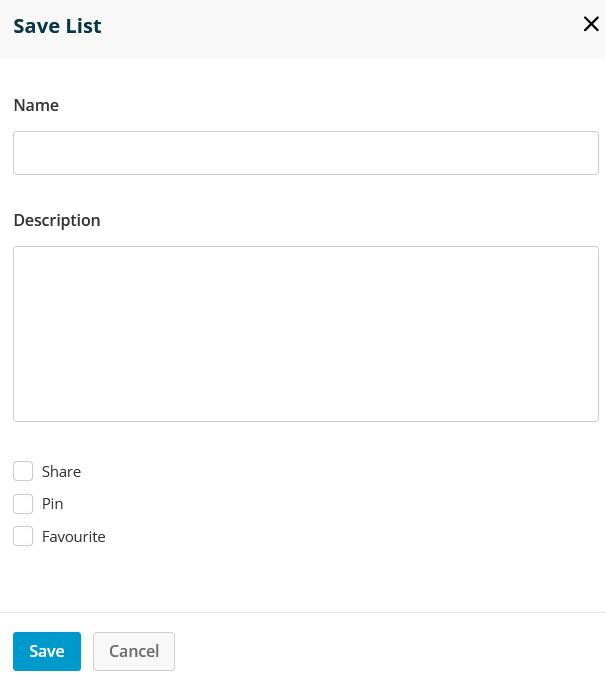
Share - this will allow the other users in your account to see it.
Pin - this will pin it to the Contact/Organisation table so you can easily find and view it.
Favourite - this will make it one of your favourite lists.
Managing Your Lists
Dynamically Update
The great thing about your CRM Lists is that they will automatically update for you. Let's say for example you've built a list of all Contacts who have visited the Pricing Page of your website; as more and more of your Contacts visit your Pricing Page they get added to that list for you. It means that you only need to create a list once and it will dynamically update for you, showing you all Contacts or Organisations that fall into your parameters the next time you view it.
Get Up-To-Date Counts
To get up-to-date counts for your lists on the list table, you'll need to re-save them. To do this you firstly need to view the list you want to re-save, head to either Contacts/Organisations and click All Lists, or head to Lists in the Contact Module dropdown menu. Once you're at the list table, click on the List Name to view it which will take you to the Organisation or Contact table that shows you who is in your list. Click + Save List in the right-hand corner of the screen, this will update your list and update the size of the list show on the Contacts > Lists table.
Excluding Contacts
If you want to exclude a Contact or Organisation from your list for any reason the best way to do this is to setup a filter that excludes them. Useful filters for this could be their Name, Email Address, Organisation Name. For example, you could set up a Contact filter for Email > Does Not Contain > Tewkesbury School.
Managing the Columns
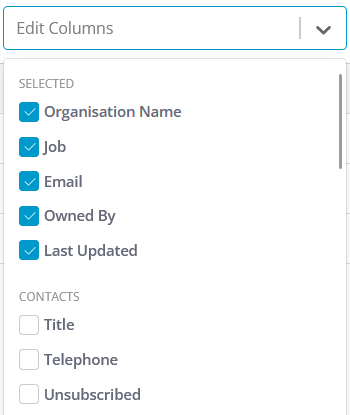
When viewing your Contacts or Organisations, you can also customise the Columns you see. To do this, click on Columns and select those you want to see:
Using Your Contact Lists
Send Them a Marketing Email
Every Contact List you build is available immediately for you over in the email marketing module as a list that you can send to.
Export The List For a Postal Campaign or External Data Management
You are also able to export your Contact/Organisation Lists. To do this you need to view the list you want to export so head to All Lists on the Contacts or Organisations page. This will take you to the table where you can see all of your lists, you can then click on the list name to open it. Once back at the Contact or Organisation table, you'll find the Export button on the right-hand side of the data grid:
Include the Columns in the table that you want to export (by clicking Edit Columns), then click the Export button and this will export a CSV file with your Contacts/Organisations.