In this article
What Are Deal Pipelines?
A Deal Pipeline is the journey a Deal takes from the point it's created to the point it's closed.
All Deal Pipelines have a name, a default length (so how long you anticipate the the Deals in that Pipeline will remain open for) and a collection of stages that the Deals transition through.
In Campus every Deal lives in a Pipeline. This helps you keep track of the state of each Deal. In the Deals Board Deals are shown in lanes - each lane is a 'Stage' of the Pipeline.
Here's what a Deals Pipeline looks like in Campus:
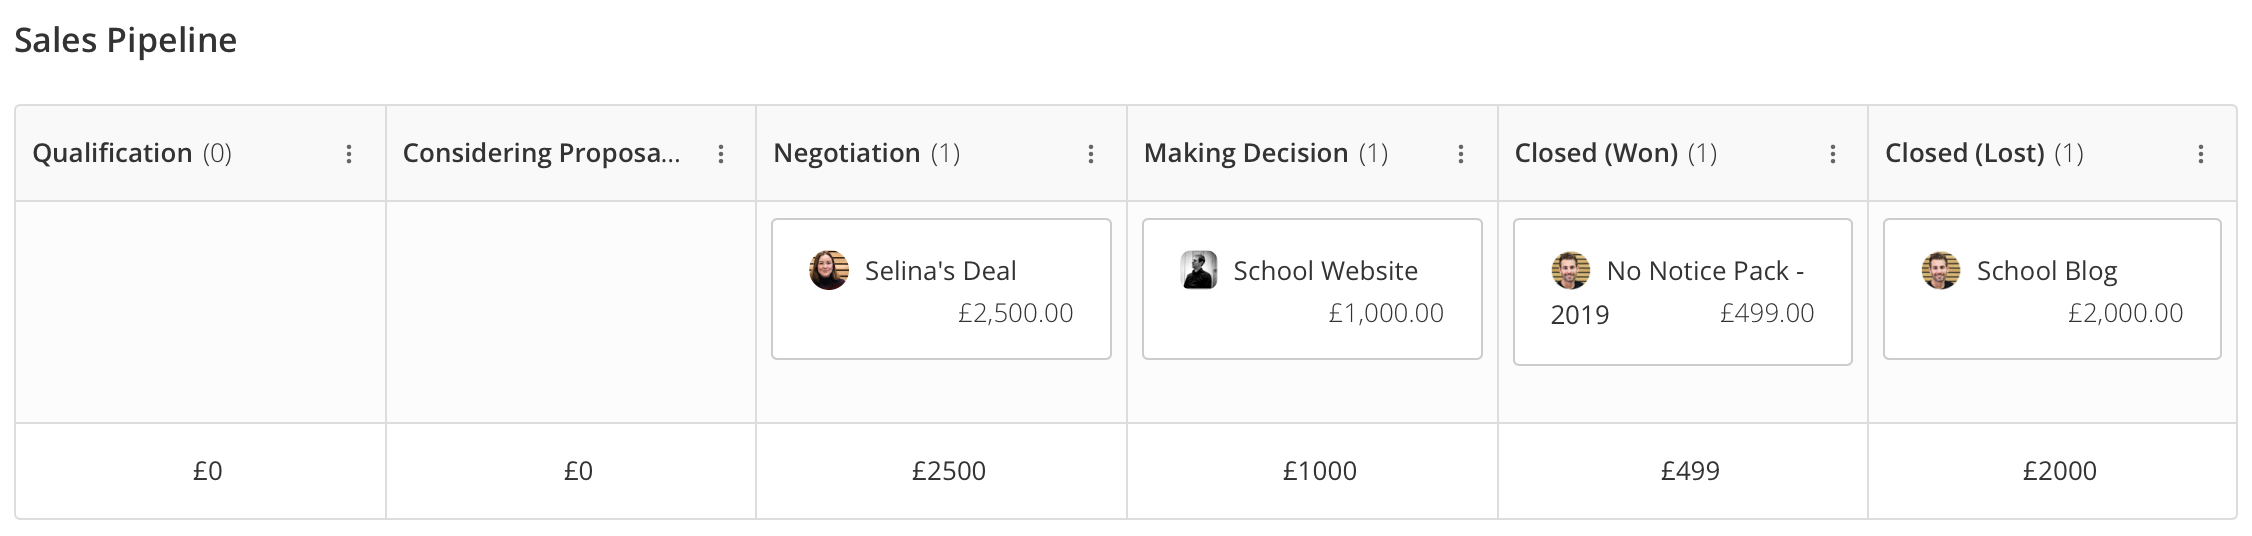
Deal Stages
These are the distinct stages of your Pipeline that a Deal moves through starting at the point it is created to the point it is closed. There are two main types of Stages - 'Open Stages', and 'Closed Stages'.
Open Stages
The Open stages are the steps a Deal moves through whilst the prospect is considering your proposal. E.g. you could have a 'Negotiation Stage' and a 'Making Decision' stage. Each Pipeline will have its own bespoke Open Stages that make sense to the Pipeline and to your business.
Closed Stages
The last stage of a Pipeline is the 'Closed' stage where there are two possible outcomes for your Deal - 'Closed (Won)' or 'Closed (Lost)'.
We cover how to create Stages later in this article.
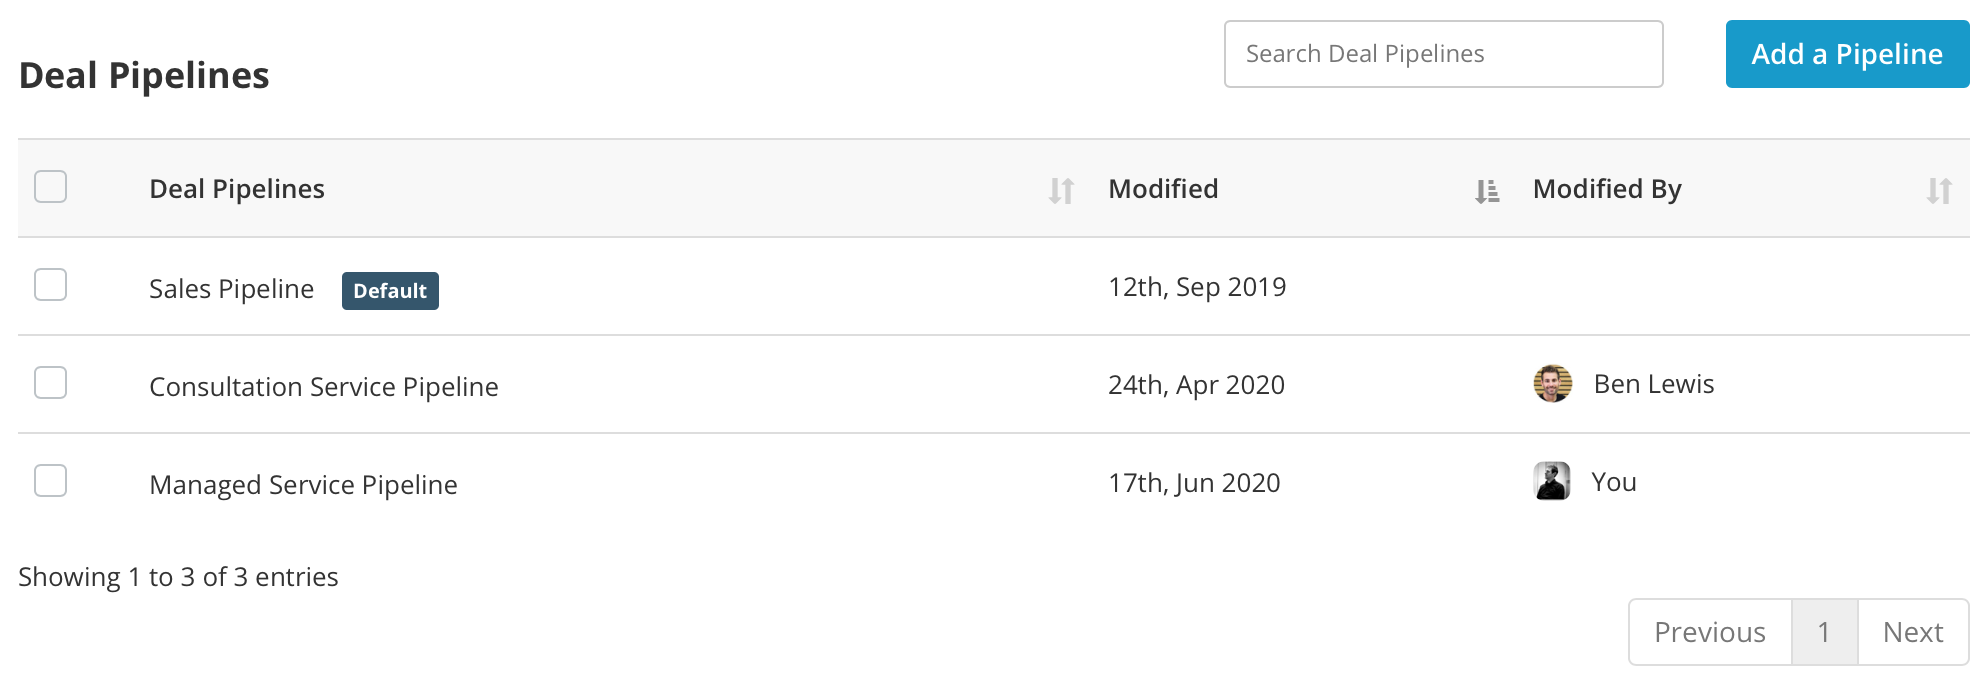
Managing Your Deal Pipelines
You can create new Deal Pipelines, edit existing ones, and also delete Deal Pipelines. This can be done in your Settings module here Settings > Sales > Deals. Scroll down to the Deal Pipelines data grid.
Adding a Deal Pipeline
1. Click on the blue Create Pipeline button and the Add a Deal Pipeline window will slide in from the right-hand side.
2. Start by giving your new Pipeline a suitable Name.
3. If you want this Pipeline to be your default one then tick the Make this the default deal pipeline checkbox. This means that when you're creating a new Deal this Pipeline will be auto-selected in the Create a New Deal window for you.

4. Add the relevant Stages to your Pipeline by clicking on the Add a Stage button and giving each stage a name.

5. Remember you can drag your stages around to reorder them - except for the two built in mandatory stages: 'Closed (Won)' and 'Closed (Lost)'.
6. Click the Save button and your Pipeline will be created.
Editing a Deal Pipeline
You can edit any of your existing Pipelines:
1. Hover over the Pipeline's Name in the data grid and click on the Edit button.

2. In the Edit Deal Pipeline page make the necessary changes.
3. Click the Save button.
Deleting a Deal Pipeline
To delete a Deal Pipeline select it in the data grid and then click on the Delete Selected button.
Any Deals assigned to the deleted Pipeline will still show as being part of that deleted Pipeline but the Pipeline on the Deals Board View will no longer show.
Default Deal Pipelines
You can set a Default Deal Pipeline. This will mean that when you come to create a new Deal in Campus this Pipeline will be automatically selected for you in the Create a Deal Form.
To set a Deal Pipeline as your default do the following:
1. In your Campus account navigate to Settings > Money > Deals.
2. Scroll down to Deal Pipelines and hover over the Pipeline you want to make your default.
3. Click the Edit button and you'll be taken to the Edit Deal Pipeline page.
4. Tick the Make this the default deal type checkbox.
5. Click the Save button.